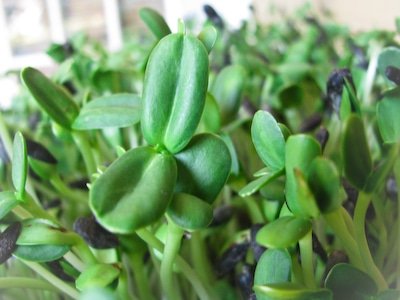
My friend Ted Skenandore of the Tsyuhehkwa Center has been growing pea and sunflower micro-greens and explained his method to me a few months ago. Now I’ve been growing them for myself as well as with the young people of the Save Our Youth program. These are his directions. My comments are in parenthesis.
- Fill a 11″ x 21″ tray with small drainage holes half full of potting soil. (The standard black greenhouse trays that are referred to as 1020 trays work well.)
- Water potting soil
- Add about one cup of seeds evenly across soil (Use one cup only if the seeds are large, like peas or sunflowers. You only need 2-3 tablespoons if the seeds are small like Chinese cabbage or radishes.)
- Add enough potting soil to cover seeds
- Press in firmly
- Water again
- Cover with second tray that is the same size and press in firmly again. (For the second tray I use one that doesn’t have holes in it.)
- Water every two days. (I have found that if the trays are indoors they only need to be watered every three to four days.)
- When seedlings start to push top tray up flip it upside down and re-cover.
- When seedlings push upside down tray up uncover and put in sunny location for one day
- Seedlings should turn green and are ready to harvest
Microgreens have gotten a lot of hype about their alleged super nutritional value. Unfortunately the evidence doesn’t yet back that claim up. They are, however, a great addition to one’s regular outdoor gardening. I like having something ready to eat one week to ten days after I sow it and they taste great.


Geoff – when you harvest do you snip them off or pull them out root and all to eat? Also, can you reuse the soil for the second batch?
I snip the greens with a scissors just above the soil level.
I’m having trouble understanding the directions. Wish there were pictures of what you mean.
Geoff will update this post, shortly. He’ll include some more pictures of the process.
Might make an interesting winter project…what other seeds do you recommend?
Wendy,
You can use a lot of seeds. Anything that you would eat as a regular green can be grown as a microgreen. Johnny’s Seeds has a good selection of microgreen seeds. Also, most seeds that are grown for sprouts can also be grown as microgreens. Some need to be harvested young. For example, once the sunflowers start to set their true leaves, which are fuzzy, they are not very good to eat.
Thanks. I was curious enough to buy ready sprouted micro greens at farmers market last week. LOVE the sunflowers. Who knew? Now I will have to grow them. 🙂