Yesterday, two weeks past my target October 24th plant date, I got my garlic into the ground. That’s a lot better than being six months late, and with the very warm fall we are having, I’m sure the garlic will do just fine. Here in Wisconsin, garlic does best when it’s planted in the fall and covered to protect it from the hard winter freezes. The cloves start setting roots under the covering long before the snow is gone. The crop is larger and healthier than it would be were the cloves planted in April.
One year, when I did not get around to a fall planting, I did start garlic in April. The plants turned out fine. They ended up ripening at just about the same time as a fall start crop, but the bulbs were noticeably smaller than those that would have overwintered. So now I make sure I always get the garlic going in the fall.
I’ve described the three hills I make in my beds and my garlic planting method back in 2007 – Garlic Under Straw.
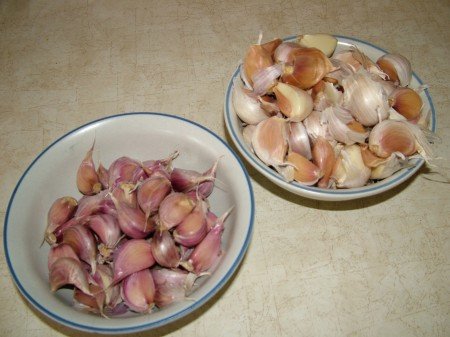
This year we planted red and white hard neck garlic of unknown variety. The cloves are from bulbs we grew last year, which were from bulbs we grew the year before. That year, we had planted a lot of nice garlic of different varieties we had purchased at the Minnesota Garlic Festival, but I did not do a good job of keeping the varieties identified. We just save the biggest and best, so now it’s just red and white.
Garlic gets better as it acclimatizes to a particular garden. Saving your own bulbs to seed produces healthier and stronger garlic than cloves brought in from the marketplace or elsewhere. The several times that I’ve brought in garlic from somewhere else, it did okay, but the second year after a season in my garden, both the plants and the bulbs were bigger.
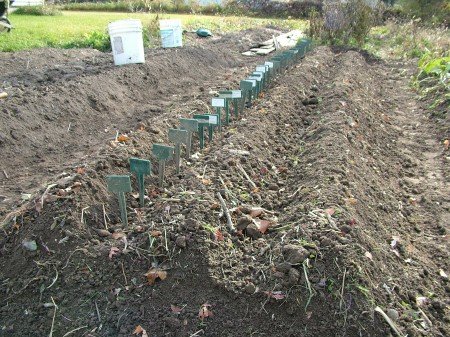
I space the larger cloves 6 inches apart. Normally, I just lay a yardstick down and move it along as I plant, but this year I laid out all my 6 inch markings with the BioMarker plant markers we are now selling. It probably was just a little bit more time consuming, but I wanted to try it and it worked fine. I put in 35 markers in one trough and planted the three ridges with 105 cloves total, about half white and half red.
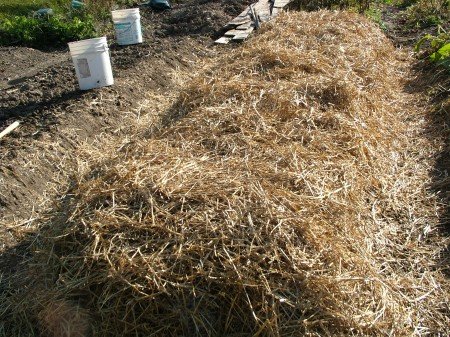
After planting, I removed the markers and the bed got covered with two bales of straw. Come spring we’ll see the new garlic flags poking through the straw.


Nice site and nice photos Noel. I just finished hand planting 1600 cloves, 12 hardneck varieties for my 2011 garlic crop. In northern WI, I am presently gardening in low raised beds 5 feet in width and 50 feet long. To form the beds, I use two, 16 foot, 2 x 4’s temporarily placed on edge, with a couple of metal spikes, visualize railroad tracks, which allows me to form even, straight-edged beds for planting.
I work in compost and organic bone meal in the first 16 foot length, screed the bed flat with a board resting on the 2 x 4 ‘s, then lay a 2 foot by 5 foot scrap of 1/2 plywood with holes drilled for proper clove spacing on the 2 x 4’s. An old broom handle with depth marker allows me to quickly punch holes of uniform depth. Moving the plywood down the 2 x 4, “tracks,” keeps things even and allows easy separation of the different varieties of cloves. I do a little map on paper to keep track of the varieties planted.
I plant a small section, lightly rake to fill the planting holes and I hand spread about 1/4 inch of sifted (or chopped) landscape bark on the flat surface for mulch, which is just enough to keep the sol surface from being pulverized and concreted by successive rains or watering next spring. I slide the two 2×4’s on the ground down a string line, repeating the process. Spread a bit of mulch along the neatly formed dirt edges of the raised bed as you move the 2 x 4’s along.
The width of the beds allows me to tend the garden without ever stepping in the beds. Four stout sticks and a single strand of mason’s string, strung about two feet high around the bed perimeter has deterred deer and wild turkeys from trampling through the beds. I need a total of about 12 cubic feet of bark for mulch, which I have chopped and bagged with the grass catcher on a lawn mower. Besides about a 120 lbs of garlic with this size planting, I harvest about 25 lbs of scapes about 6 – 8 weeks before digging the crop. Hope this info inspires others to plant this wonderful crop.
Don, you are one serious garlic grower. I’m presuming you are growing for market or somehow sharing that garlic with others? I plant a hundred cloves. A hundred bulbs last us a year easily, and Judy uses a lot of garlic.
I like your idea of a planting board. I use a big plywood board to plant from, just laying it directly on top of the beds to spread out my weight and not pack down the soil, but the idea of having side rails to act as a track makes a lot of sense, especially in the big beds you are working with. Thanks for the comment.
Hey Noel, I have several friends with whom I trade for peppers or varietal tomatoes, or other specialties, etc that I don’t always grow and some goes to a few chefs that want local produce. Picture the 5 foot-wide beds with a 10 foot strip of mowed field between each raised bed and I am never walking in mud to garden.
The scapes are my favorite and are eaten or simply bagged and frozen. Used like a green onion in soups, salads or stir-fry or in herbed, home-made bread, they cannot be beat. My favorite use is four oz fresh or frozen basil, 6 oz scapes, 5 oz parmesan cheese, 2 oz pine nuts and about 1/2 cup virgin olive oil processed into pesto. Our favorite is pesto and diced tomatoes on pasta or on a hot baked potato.
I’ve been to your site before and remembered it being referenced on WPR garden talk show earlier today.
Don,
How do you tell the best time to harvest the scapes? We’ve had them get too grown out and no longer usable. We’ll definitely give that pesto recipe a try.
Early, eight to ten inches long, probably 12 inches maximum. Of course the different varieties will have different scapes. Drop me an email and I’ll send a picture. Looked at my harvest records and it was mid-June this year with the warm spring.